POS Menus
Published Date: 22/03/19
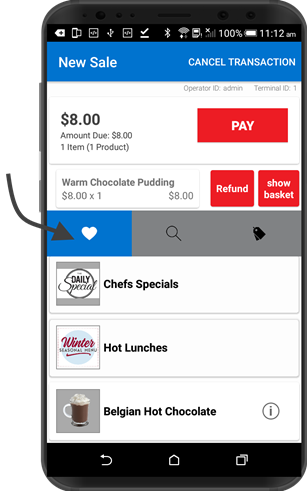
Menus are used to create a custom 'favourites' menu for your location, containing a user-defined list of products for quick selection on the nomadPOS app. The operator browses the product list loaded within the Menu section of the Sales screen.
Menus are useful for products that are either difficult to scan don't have a barcode at all. They're also good for consumer facing kiosks, as they provide an interface and easy navigation which allows the user to efficiently add items to the shopping basket. You could also use a menu to load seasonal or promotional products.
Things to Consider
- Menus offer a lot more flexibility compared to category navigation on the app. Products can exist within the same menu multiple times, a menu has no depth limitation, products can be added at varying depths, and products can exist in multiple menus.
- Multiple Menus can exist within your NMC at any one time. Each menu is created and maintained independently, and each device can be configured to make use of one of the menus. Only one menu can be active on the nomadPOS app at any time. If your device has multiple apps installed (and linked to the same database), they’ll use the same menu.
- The active menu either shows within the Menu tab on your app, or according to the custom design specifications for your app. All products in the database show in the Menu if a custom menu has not been assigned.
Designing your Menu
You control the order and sequence of a menu. Each element of the menu can either be a link to a product or to another (sub-menu) level of the menu. Each menu level can contain a mix of sub-menus and products (including products which sit outside any menu level).
When setting up a menu, you specify the following options. Colour, Font Colour, and Post Select Action fields may be ignored in your app, if custom behavior has been hardcoded for your solution.
- Type (root menu, sub menu, or product)
- Caption to display on the app (optional)
- Button colour and font colour (optional)
- Image (optional)
- Post select action (for products only) that happens after the product is added to a basket in POS. navigation options include: Stay in existing menu so that more products can be added (default), Go to Top Menu, or Go up one level.
Image Options
- Images are only visible on the nomadPOS app if images are enabled in configuration.
- Images should have a clear background, so that they show against the background of your app.
- Recommended image dimension is the resolution of the device; Images will be resized smaller to fit a placeholder, but will not be stretched if too small.
- If the product has an image saved in the product record, the menu will use this image if you don’t add an image to the menu item. This allows you to have two different style/size images in use for different purposes.
- The caption shows on the button if no image exists. If no caption or image is specified for a product menu button, then the product description or product image displays on the button instead.
- The shopping basket uses the image saved against the product record. So if you only assign a menu image (without an image saved in Products)), an image won't be shown for this product when viewed in the shopping basket.
Configuration Options
See Configuration within Device Setup to learn more about these settings.
- Custom Menu Code
- Custom menu ID to display in the app
- Favourites browsing is visible
- Product images are visible
You can set a custom favourites menu at location level (so that all devices linked to that location share the same menu), or apply an override at the terminal/device level if you need a different menu on selected devices.
What do you want to do?
Add a New Menu
Add Menu Categories to an Existing Menu
Add Products to an Existing Menu
Reorder Products or the Level of Menu Items
Activate a Menu on the nomadPOS app
Delete a Menu or Menu Items
Add a New Menu
The Code and Description for a saved menu can be edited at a later date.
- From the sidebar, click Settings.
- Click Menus.
- Click Add.
- Enter a Code for the Menu.
Alpha-numeric entry is permitted. The Code must be unique for this database. - Optionally enter a brief Description which outlines the contents of the menu.
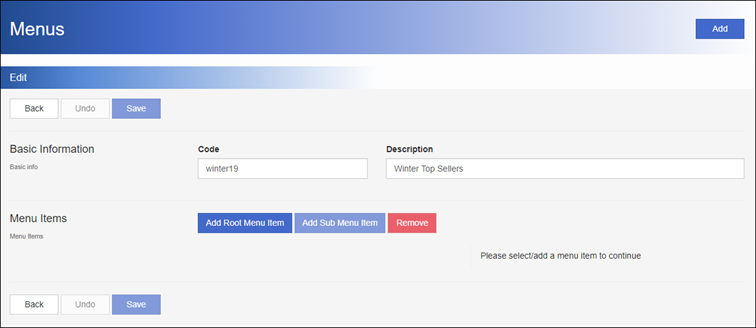
- Click Save.
Root Menu and Sub Menu Item options are now displayed. - You're now ready to Add Menu Categories and Add Products.
- Once you've designed your menu, remember to Activate The Menu on nomadPOS.
Add Menu Categories to an Existing Menu
You can add two types of menu navigation: Top (root) categories, such as Hot Food, and sub menus (such as Burgers or Pasta/Rice Dishes within the Hot Food top menu).
You control how deep the menu is. If you don't want your products in categories, skip ahead to Add Products.
- If not already in the Menu, load it from Settings | Menus.
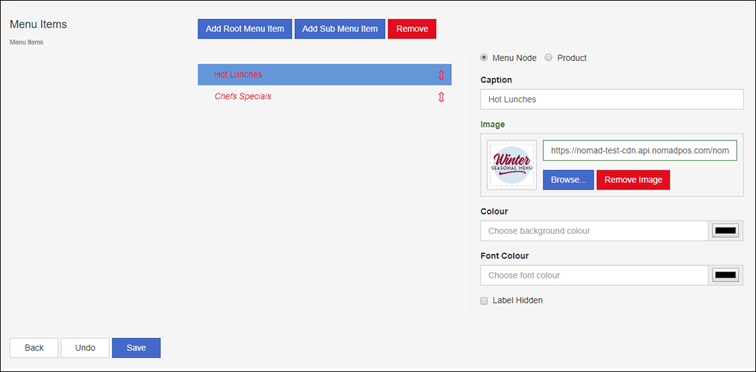
- To Add a top (root) menu category: click Add Root Menu Item, and select the Menu Node option.
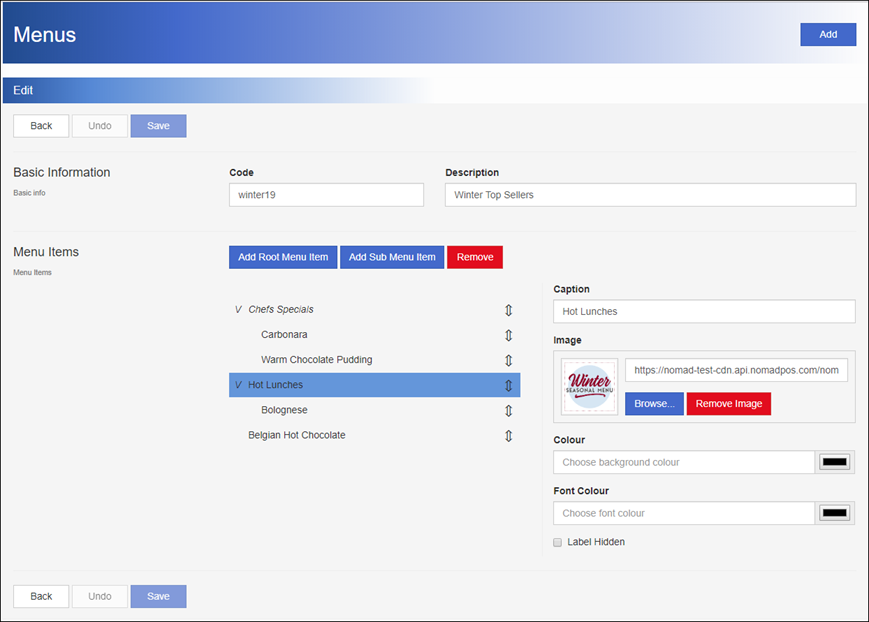
To add a sub menu category: click to highlight the menu node item to add within, click Add Sub-Menu, and select the Menu Node option. - Optionally type a Caption to display on the app.
If you leave the Caption blank, the app will display the image only. Label Hidden is not in use at this time. - If required (and enabled), either type the url of an image saved on your server, or click Choose File to save the image in the portal.
- If required (and enabled), change the default button Colour and Font Colour.
You’ll usually only select a background Colour if there isn’t an image for a menu item. - Once you've added all the menu items you wish to add, click Save.
Unsaved changes are indicated in red font.
Undo only cancels all changes made since you last saved.
Go to Reorder Menu Items if you need help with this task.
Add Products to an Existing Menu
Each menu level can contain a mix of sub-menus and products (including products which sit outside any menu level).
Products can belong to multiple menus, and multiple sub menus within a menu.
If a product has multiple EANs with the same pack and size dimensions, you can link any of them to the menu item.
- If not already in the Menu, load it from Settings | Menus.
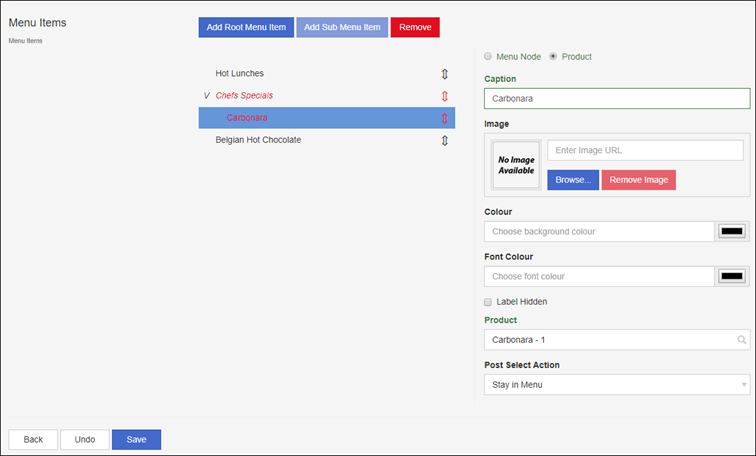
- To place a product within a category, first select the root or sub-menu the product will sit within, and then click Add Sub Menu Item.
To place a product which sits outside all categories, click Add Sub Menu Item. - Select the Product option.
- Optionally type a Caption for the product.
If you leave Caption or Image blank, the app will display the product description or image instead. Label Hidden is not in use at this time. - If required (and enabled), add an Image for the product.
- If required (and enabled), change the default button Colour and Font Colour.
You’ll usually only select a background Colour if there isn’t an image for a menu item. - In Post Select Action, select what menu level the user is returned to after adding the product to the sale (defaults to stay in menu).
- Once you've added all the products you wish to add, click Save.
Unsaved changes are indicated in red font.
Undo only cancels all changes made since you last saved.
Go to Reorder or Move Products if you need help with this task.
Reorder Products or the Level of Menu Items
Reorder the position of root menus, sub categories, and products within a sub menu:
- If not already in the Menu, load it from Settings | Menus.
- If required, expand the menu structure.
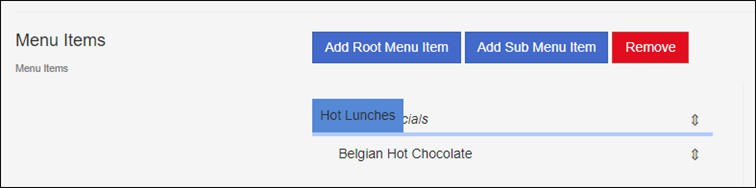
- Click-hold-drag the two-way arrow to move the selected item to its new position.
The insertion point is indicated by a blue line. - Click Save.
Unsaved changes are indicated in red font.
Undo only cancels all changes made since you last saved.
Move sub-categories or products into a different category:
- If not already in the Menu, load it from Settings | Menus.
- If required, expand the menu structure.
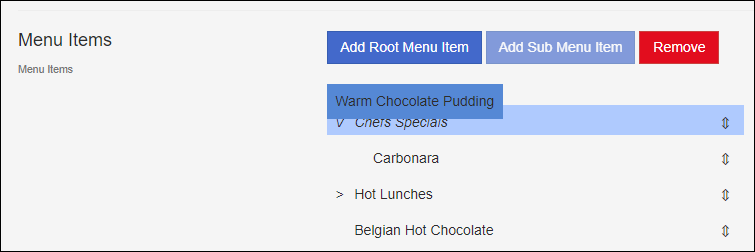
- Click-hold-drag the two-way arrow to hover the selected menu item over the new menu level it will be inserted into.
The insertion level is indicated by a highlighted row. - Click Save.
Unsaved changes are indicated in red font.
Undo only cancels all changes made since you last saved.
Make a Menu Visible on nomadPOS
You can apply a menu at the retailer, location, or terminal level.
- You need the Code of the menu, which you'll find in Settings | Menus.
- From the sidebar, click Settings.
- Click Configuration
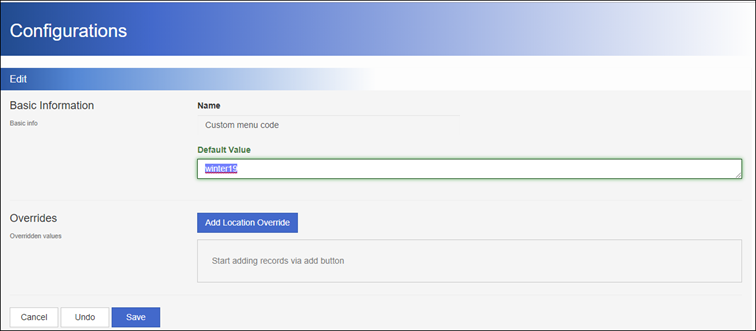
- Locate and double-click CustomMenuCode.
- To use the menu across on all devices, in Default Value, type the Code for the menu.
To use the menu in a specific location, click Add Location Override, select the Location, and enter the Code.
To use a menu on a specific device, click Add Location Override, then Add Terminal Override, then select the Till and enter the Code. - Click Save.
Remove Menu Items or Delete a Menu
You can delete only specific menu items, or the entire menu.
You cannot delete a menu currently assigned as the CustomMenu in Configuration; the Delete button will be disabled.
Remove Menu Items:
- If not already in the Menu, load it from Settings | Menus.
- Select the Menu item to remove; expand the structure if required.
- Click Remove.
- Once you've made all changes, click Save to apply all changes made.

Delete an Entire Menu:
- From the sidebar, click Settings.
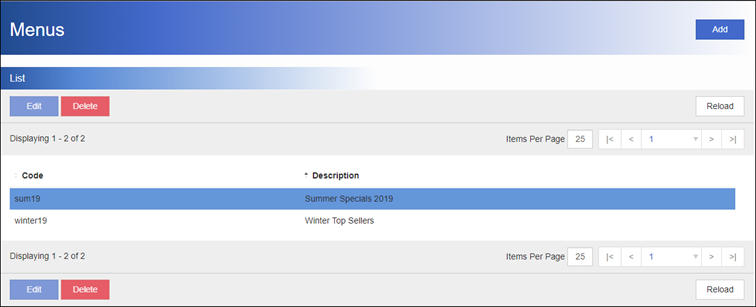
- Click Menus.
- Click to highlight the Menu to delete.
- Click Delete.
- Click Delete to confirm the action.