Welcome to NomadPOS Blue!
NMC + Android App
The Android app is the front end – Point of Sale (POS) to make a sale. All the management of products / services happens at the backend, via NMC
We recommend Google Chrome as the best web browser to view the content on this site.
Other web browsers may cause the text, images, or printing to not display properly.
These help documents cover everything you need to know to get the Android App up and running to suit your business needs.
The NomadPOS Blue app is available for download on the Google Play store. It is installed on an Android mobile device (such as a phone or tablet.) It integrates seamlessly with the Nomad Management Console (NMC). The app delivers all the core features you need to sell products, plus some additional features you can utilise as required.
First Time User?
Check out the Quick Start Handout to get familiar with all the things you can do in the app.
Getting Started
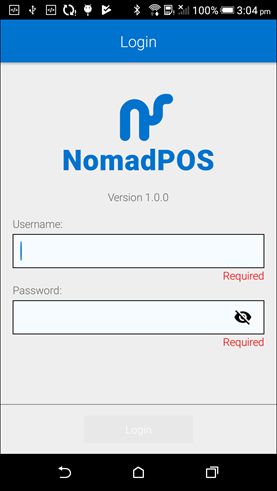
Sign in to the Android App
Access to the Android App is restricted by user ID and Password. Your login credentials are emailed to you when you sign up (Please save these emails for future use).
- The first person to create the set up becomes the Administrator of the system. This Admin maintains responsibility for sign in credentials and assignment of operators. This is done at the Management Console, by logging in to NMC
- Only one user can be signed in to the app on the device at any time
- Password is a maximum [8] characters.
- Only one user can be signed in to the app on the device at any time.
- An active wireless data connection is required to validate login. Once these details have been obtained, the app can run offline even if the data connection is lost; the last user signed in can continue to transact and complete sales (subject to bank offline payment capabilities). Emailed receipts will be queued and sent when the device is online.
First things first
Follow the following sequence for a hassle-free setup


New Sale
The products / services added via NMC are now visible in the Android App
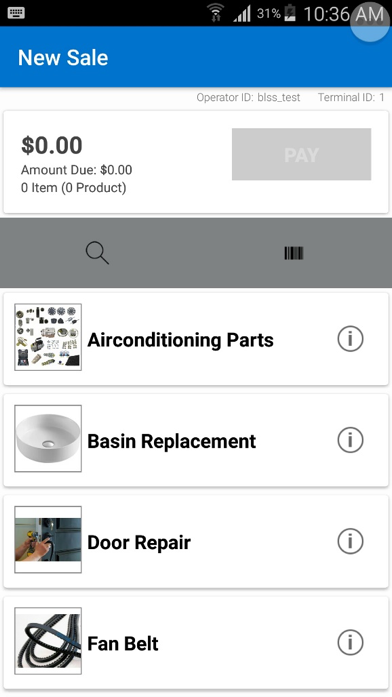
Add images
Adding images to each of your products or services is optional and must be done via NMC.
Things you need to do
- Source your images. You can save them to your hard-drive, or in an online cloud service
- Add the image against the product:
NMC > Products > Search > Select Product > Edit > Selling info > Browse Image > Save
Considerations
- The number of characters for product name (before truncation in the app […]) is less if product images are used
- Recommended image dimension is the resolution of the device; Images will be resized smaller to fit a placeholder but will not be stretched if it is too small
- Images should have a clear background, so that they show against the background of the app
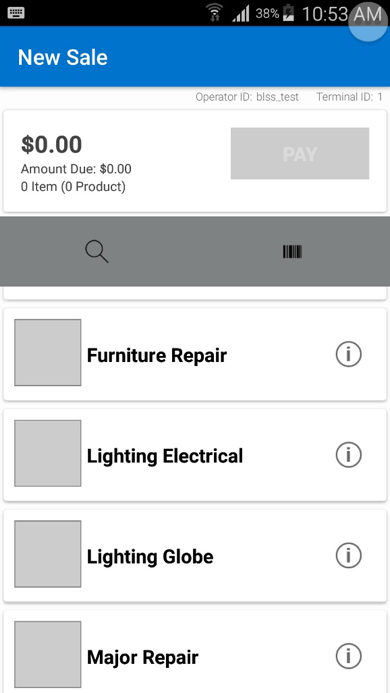
Add items to the basket
There are 3 ways to add items to the basket
- Scroll through the list of items, selecting/clicking on the item will add it to the basket
- Search for the items using the search icon
- Scan the barcode of the item using the camera of your android device
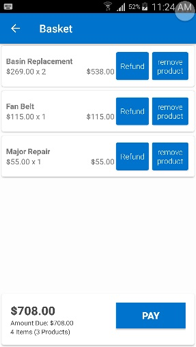
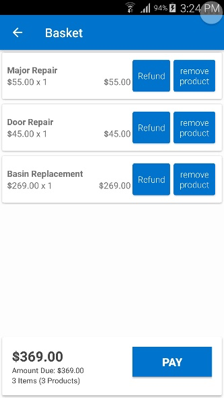
After the items have been added to the basket, Click on ‘Show Basket'
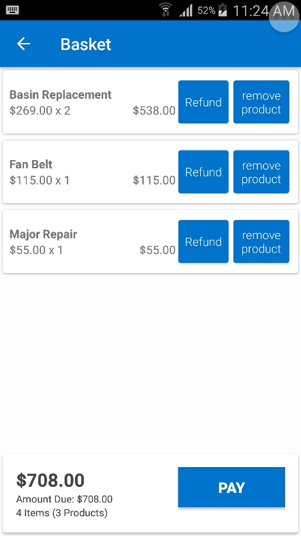
More details on Refund here
A word of caution: Clicking on the ‘Refund’ button instead of ‘Remove Product’ button will lead to wrong payment amounts
Update product/service: Quantity or Price
Clicking on a product in the basket takes you to the Product page
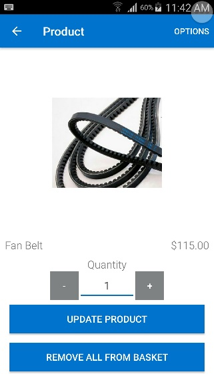
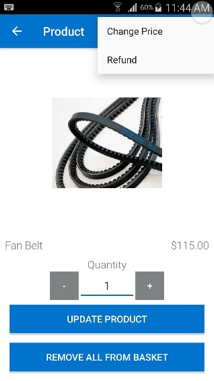
Update quantity Click on 'Options' to change price
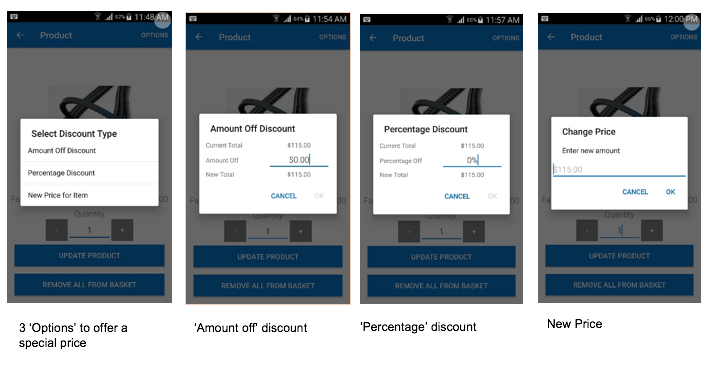
Give Special Prices / discounts
After updating quantity or price or both, proceed towards completing the sale.
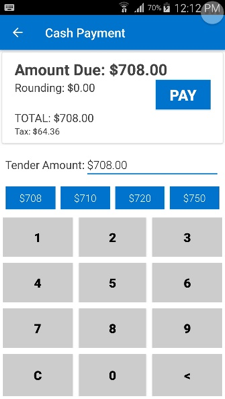
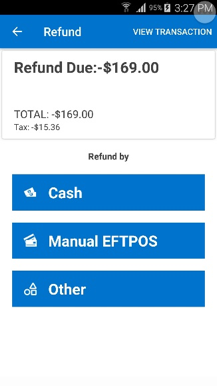
Payment
Click on ‘Pay’ to finish the sale

There are 3 payment options – cash, credit card or other modes
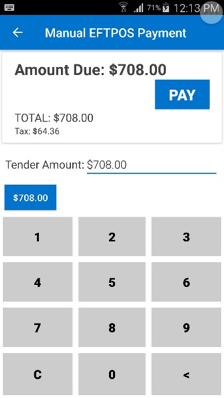
You can use any external manual EFTPOS device, as there is no integration to the app. Contact us if you would like a payment integrated solution
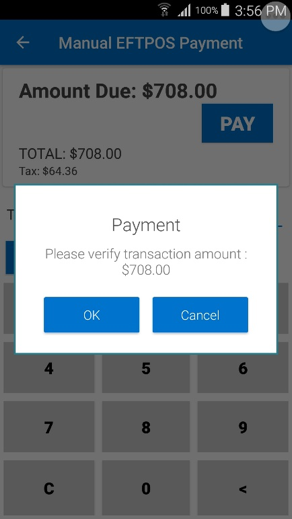
The operator should complete the transaction on the manual EFTPOSdevice, to ensure it goes though successfully, before they verify the transaction amount on the app.
Currently, NomadPOS Blue does not support multiple modes of payment. If you accept multi-tender and the sale can’t be finalised, you’ll need to cash the sale off and follow your business’s process to Refund the partial payment back to the customer’s bank card
Receipts
There are 3 receipt options – print , or go the green route and send a digital receipt or no receipt at all!
Option 1 – Print Receipt
- Pair an external Bluetooth printer to the device, if one will be used. The only external Bluetooth printer currently supported is the HPRT printer
- Tapping Print Receipt automatically prints the receipt on the printer installed. An error message is displayed if a printer hasn't been paired yet
- You can issue the same receipt multiple times; you can return to the Home screen once you select No receipt, Thanks.
- If a customer returns and requests a receipt from a past sale, you can print the receipt via the Transactions function.
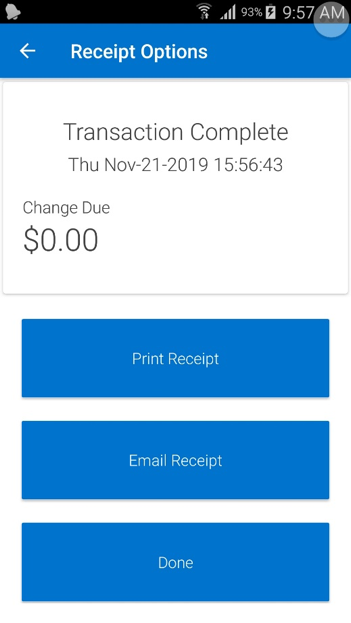
Option 2 – Email Receipt
Enter the customer’s email id. Emails are sent from the default account set up on the device
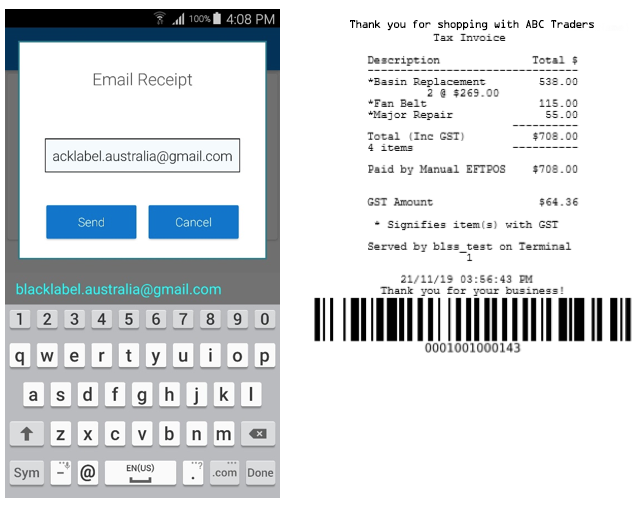
Click on ‘Done’ to send out the email receipt to the intended recipient
Suspend a sale
A sale is suspended temporarily under these circumstances inorder to service other customers
- Customer has forgotten a wallet and wants to pay at a later time
- Situation: In a pop-up Sunday market : Customer ‘A’ has proceeded towards billing, but has a change of mind and wants to look around the store to add more items in the basket. While Customer ‘A’ fetches more items to add to the basket, other customers in the queue can be serviced. Customer ‘A’s transaction can be pulled up at a later time and can be completed when Customer ‘A’ is ready
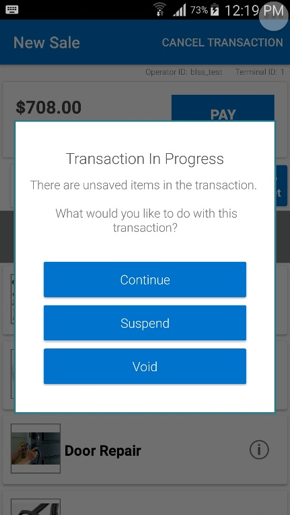
- The operator suspends a sale by starting a new sale (Make a Sale) or by simply clicking the ‘back button of the android device’ and clicking on ‘Suspend’
- A suspended transaction does not print
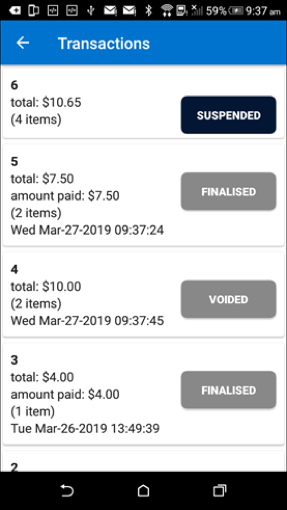
- Suspended sales are stored in the Transactions List. Tap to resume the sale.
- Suspended sales can only be resumed on the same NomadPOS terminal it was suspended on
- Suspended and voided sales do not currently report in the NMC. This data is however stored in the api
Void a sale
- The operator can void a sale by starting a new sale (Make a Sale) or by simply clicking on the ‘back’ button of the android device and selecting ‘Void’
- You can only void the sale if payment has not been started. You'll need to cash the sale off and follow your business’ refund process to Refund* the partial payment back to the customer
- Voided sales are listed in the Transaction List in the app for reference
- Voided sales are read-only; they can’t be resumed or finalised under any circumstances
- Voided sales are not transmitted up to the server
Refunds
Refunds are used to facilitate the return of an already paid item/s, so that the customer can get their money back.
The NomadPOS app offers two ways to handle refunds:
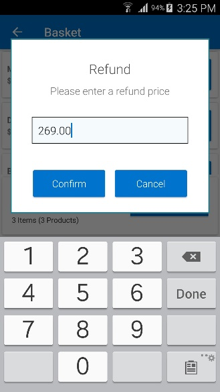
- Within a sale: By design, the app allows operators to refund an item during a sale. They're prompted to confirm the refund price and sell other items in the same sale transaction
 The ‘Refund’ button present against each product in the basket is used for refund purposes
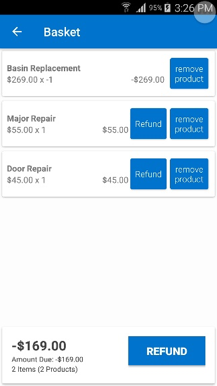
Refunds are still considered to be a sale, even if there are only refunded items in the transaction. The Total Items in the sale only includes items being purchased, it excludes any refund items (so it will show as [0] if it only contains refund items).
- Refunded items show in the shopping basket with a positive unit price, and a negative quantity and extended price.
- Refunded items show on reports and in the NMC Transactions function with negative values for extended Price, tax, and quantity. This will impact Grand Totals on the reports.
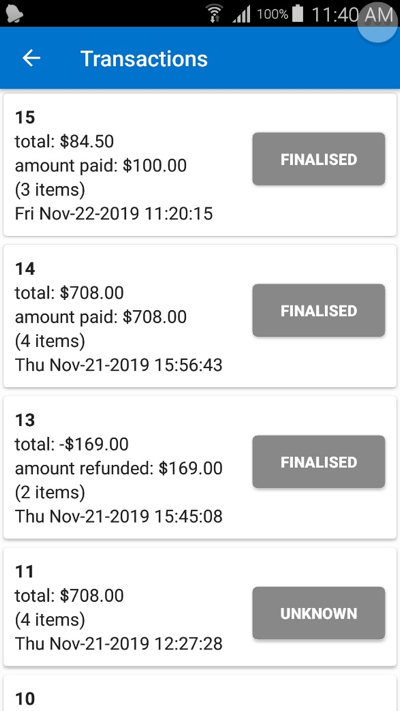
Transactions
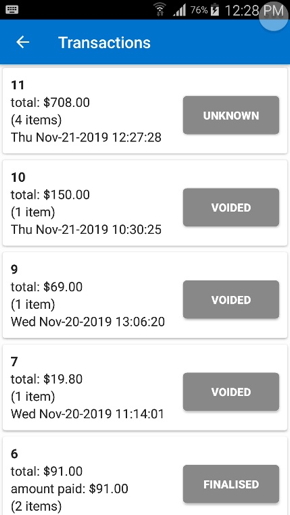
Clicking on the Transaction Tab lists all the transactions performed on that particular device
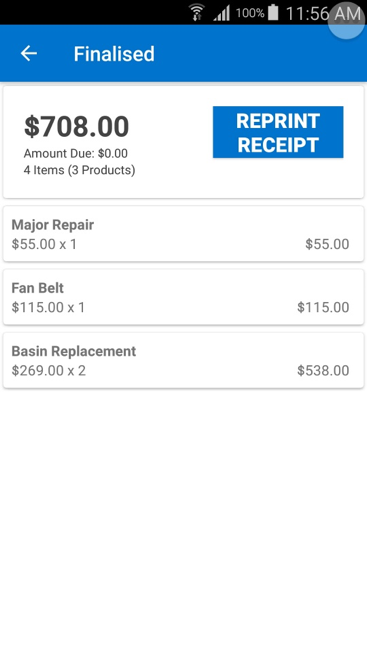
Selecting a ‘Finalised’ transaction displays the items in the bill and provides an option to ‘Reprint the Receipt’ – either email or print the receipt if a printer is connected to the device via Bluetooth
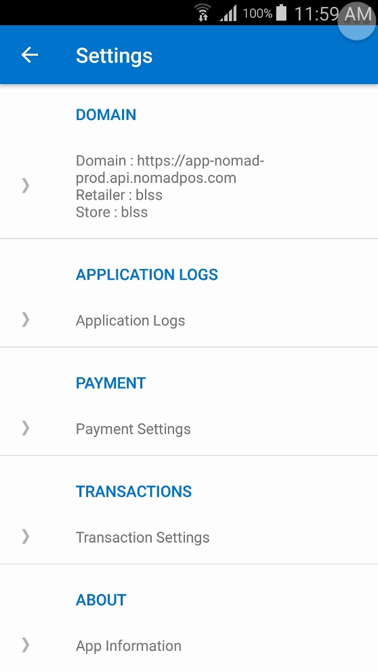
Settings
The Setting tab only displays details about the app and transactions. All the settings are controlled via the NMC