Product Category Setup and Maintenance
Product Categories are used to bundle similar products together. They add order to your product listings and reports. Categories make it easier to find products in the app (if category browsing is enabled.)
Tip: Product Categories must be set up before you can manually add a product in the NMC.
Things to Consider
- Every product must belong to a category, and a product can only belong to one category. You'll need to duplicate the product record if it needs to exist within multiple reporting categories.
- A category must be created down to a defined depth, and products can only belong to the lowest level. The default number of levels is one: parent category | products.
- You can set a Maximum Manual Discount Percentage that an operator is allowed to give to products which belong to a specific category. You can set the discount at any level of category and can override it at lower levels of the category. It defaults to 100%.
- You can add an image at any level of category, to make navigation more presentable when selling on the app. You can either upload an image or specify the URL for the image. The recommended image dimension for category images is the same as the resolution of the device; Images will be resized smaller to fit a placeholder, but will not be stretched if too small.
Add a New Category
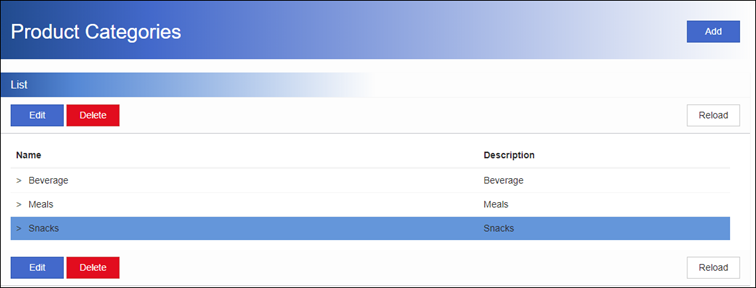
- From the sidebar, click Settings.
- Click Product Categories.
- Click Add.
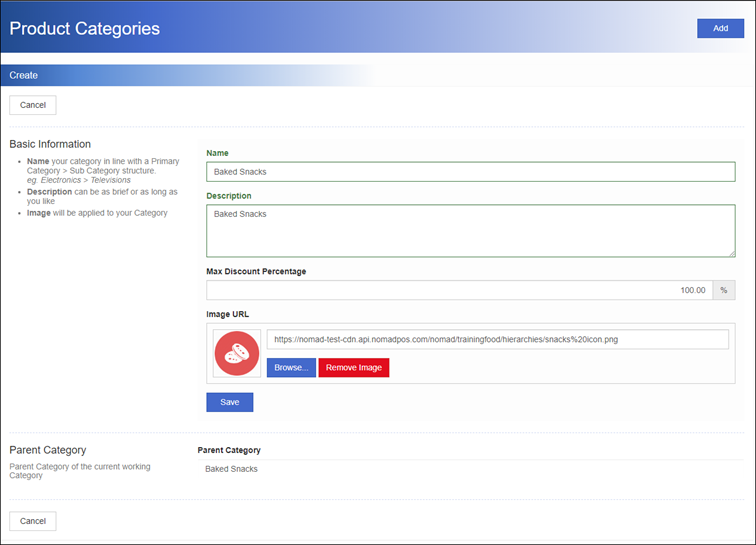
- In the Name field, type a name to identify the category.
- In the Description field, type a few words about the category.
- Optionally edit a Maximum Discount Percentage allowed at POS for products which belong to this category.
- Optionally add a category image; either type the Url of the image saved on your computer or click Browse to identify the image and save it in the portal.
A thumbnail of the image is displayed on the app. - Click Save. Sub Category selection is now visible. To add a sub category under this category: Click Add The category is promoted to Parent. Complete the Basic Information Fields. Click Save. The new sub category displays if you Reload the parent on the front List screen.
Edit or Add to a Category
You can only delete a category if there are no products and no sub categories linked to it (at either the parent or child levels)
- From the sidebar, click Settings.
- Click Product Categories.
- Click to highlight the required category in the list.
- Click Delete
- To edit the Basic Information, amend the details, and then click Save.
- To add a sub-category, under Sub Categories, click Add. Type the Basic Information, and then click Save.
Click Go Up to navigate back to the Parent Category.
Delete a Category
You can only delete a category if there are no products and no sub categories linked to it (at either the parent or child levels)
- From the sidebar, click Settings.
- Click Product Categories.
- Click to highlight the required category in the list.
- Click Delete.
- Click OK to confirm.