Locations
Location represents the place where transactions on the POS are performed. All locations linked to the Merchant share the same product database, selling categories, and operators.
Tip:You must have at least one selling location set up in the NMC
Things to Consider
- Locations are usually pre-populated during installation, but you can modify them and add additional locations for your company in the NMC.
- A location typically corresponds to either a specific location with a unique physical address, a region, or a meaningful reference.
- If POS devices will be physically located across multiple physical independent sites within your organisation, you may want to create multiple selling locations. For example, a business with NomadPOS app devices located in 'St Kilda Store' and 'City Store' etc.
- Establishing multiple locations is useful for reporting and tracking sales over time. All customer-related interactions, such as taking payments, issuing refunds, and managing inventory, are linked to a specific location. You can filter reports to only show transactions performed at a particular location.
Setting Location against on a Device
- You’re prompted to set your domain-retailer-store the first time you sign in after installing an app (or if you Clear Data). This loads any custom theme and location configuration, and synchronises the terminals, operator logins, categories, and products which have been created against your company.
- If you ever need to Clear Data for the app, (such as to change the Location / Venue that a device is logged into, so that you can clear and re-load the POS configuration, product database, pricing, and custom menus for the new location), any pending/unsent transactions should be synced with the back-end first. Otherwise, they'll be recorded against the location configured at the point in time they're sent to the server. Cached credentials, transactions and settlements are also cleared. Logs and hardware settings stay the same.
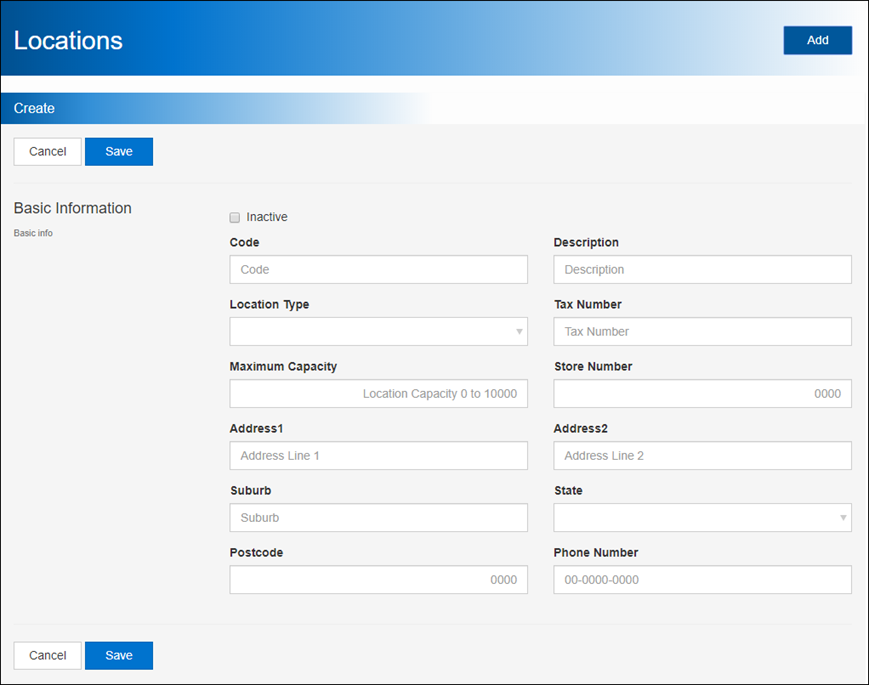
Add a New Selling Location
When you add a new Location, all products are linked to it with model stock and stock on hand set to zero.
- From the sidebar, click Settings.
- Click Locations.
- Click Add.
- If using Location Type, select the Location Type this location will belong to.
- Enter a Code to identify the location.
- Enter a Description (the name) of the location.
- Enter any other information available.
- Click Save.
View or Edit Locations
Locations currently cannot be deleted from the system (as they have products assigned to them). Rename the Location to reallocate it.
Changed location details are automatically updated on the app (via an active internet connection); the operator is required to sign out and back in to see the change.
- From the sidebar, click Settings.
- Click Location.
- Optionally select a Location Type to filter the results.
- Optionally enter a Location (code or description) to filter the results
- Click Search.
- Double-click the required location in the list.
- Click Save.