Import/Export
Use the Import/Export tab to edit, analyse, upload, and download product data in bulk. You can export the entire product file, make changes as required, and then import the new file.
Things to Consider
File Format
- The accepted file format is .xls/.xlsx/.csv. The maximum file size that can be uploaded (on the server side) is 5MB.
- Your import spreadsheet must contain the following column names in the listed order. The import will encounter an error if there's a mismatch.
| Product Code | Description | SellUnits | PackDescription | SellCodes | StandardPrice | Size | SizeDescription | ProductHeirarchy | Taxes |
|---|---|---|---|---|---|---|---|---|---|
| 1201 | Lightning Globe | 1 | Single | 1201 | 3.00 | 1 | Unit | Electric Parts | 10 |
* Separate each category level (or Product Hierarchy) using the pipe (|) character e.g. Beverages | Hot Drinks | Coffee
Import/Export Logic
- A new product will only be added to the NMC if you've entered all fields correctly. If you're updating an existing product, all fields except Product Code can be modified. Only values which have changed will be updated during import. Any previous value is overwritten.
- Open the Field Definition Table in a new window if you need help to complete each field correctly.
- Price must be set to [$0] or greater. If you clear an existing price to blank, the edit is ignored on import, and the previous price remains.
- The file import currently only does very basic validation of the data to be imported. Not all errors are reported. Only rows that don't contain an error will be imported; the NMC will not update the product if the row contains invalid data.
- You can see the status of submitted files (EP-105 In Progress). The status may be 'In Progress', 'Completed, 'Completed with Error/s', or 'Failed'. If an import 'Completed with error(s)', view the error log to identify the source(s) of the error. (EP-106 In Progress)
- Only ‘StandardPrice’ and ‘Taxes’ field can accept a decimal quantity. Other Fields that contain a decimal quantity or a negative value will not be imported.
Sample Screen
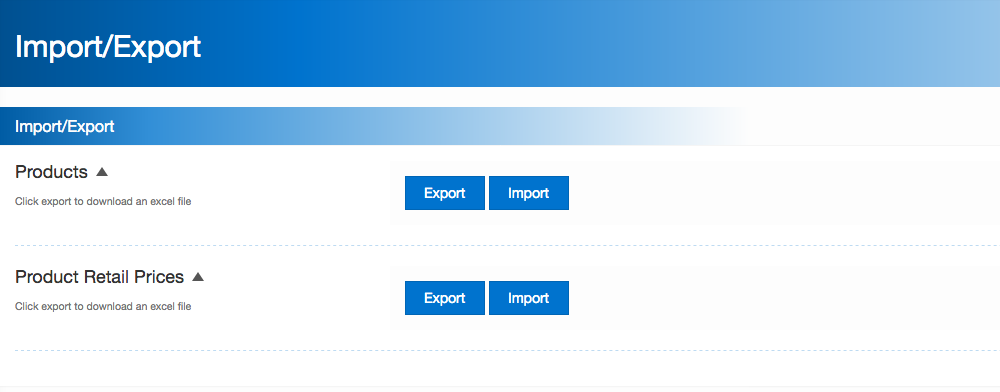
Export a Product File
- From the sidebar, click Settings
- Click Import/Export
- Click Products
- Click Export A file is generated at the bottom of your screen. The file can also be found in the downloads directory,
- Open the file
- Select Enable Editing above the worksheet to save or edit the file You can add new products and edit the existing products, and then import the file. Use the pipe character (|) to add additional barcodes or expand the Category.
Import a Product File
Use the import function to upload new or modified product records in bulk.
Tip:We've set up a template so it's just right; simply export if you don't have our template yet, and then have fun filling it with your stuff, taking care not to add new columns or anything. If in doubt, or if you require special handling, please contact us.
- From the sidebar, click Settings
- Click Import/Export
- Click Products
- Click Import.
- Locate and click the file that you want to open; click Open The file must match the import template specifications If the file imports successfully, any new records and operational categories are created, and any modified products are updated.
Export Retail Prices
- From the sidebar, click Settings
- Click Import/Export
- Click Product Retail Prices
- Click Export A file is generated at the bottom of your screen. The file can also be found in the downloads directory
- Open the file
- Select Enable Editing above the worksheet to save or edit the file Edit the existing prices as required, and then import the file. Enter [0] to set retail price to zero
Import Retail Prices
Tip:We've set up a template so it's just right; simply export if you don't have our template yet, and then have fun filling it with your stuff, taking care not to add new columns or anything. If in doubt, or if you require special handling, please contact us.
- From the sidebar, click Settings
- Click Import/Export
- Click Product Retail Prices
- Click Import
- Locate and click the file that you want to open; click Open The file must match the import template specifications If the file imports successfully, the modified products are updated.
Import Status
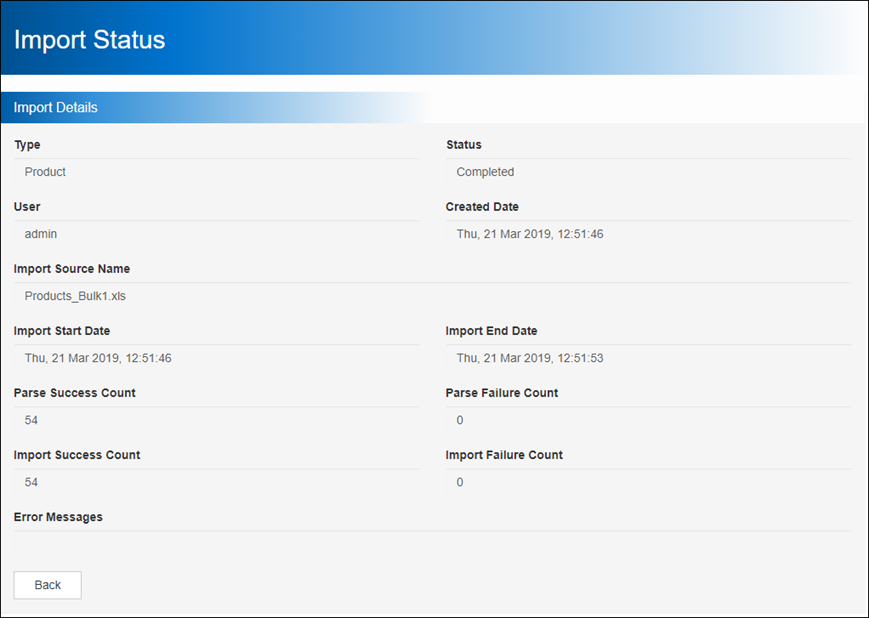
- We recommend you always click on the Import Status tab to check the import status after you import a file, to confirm the success of the import. Detailed errors messages are provided in the log, so that you can identify the source(s) of the error and initiate appropriate corrective measures.
- You can filter the logs by date, import type (i.e. product, retail price), status, and the user who created the import.
- The status of an upload is available for 7 days. A maximum of 100 errors can be displayed within a log file.
- The following is a list of the more common reasons why a product import will fail:
- Import failed to initiate
- Imported file columns does not match: your spreadsheet is missing or contains additional columns than the template expects.
- One or more imported recorded have validation error i.e. Category name must be 1 -255 characters long (check that each level is separated by a |, or that the category is unique)
- Network is unavailable for further upload
- Processors' import limit reached
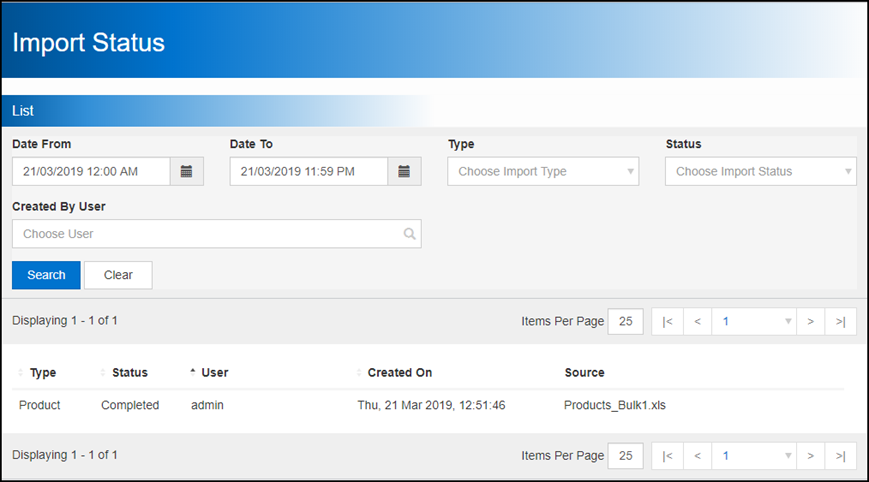
Review the Status and Error Logs for a Submitted Import File
- From the sidebar, click Settings.
- Click Import Status.
- Optionally enter search criteria to filter the results: Date From/To, Import Type, Import Status, Created by User.
- Click Search.
A list of imported files which meet the search filter is displayed. - Click an import in the list to view the details and any error messages.