Terminals
Published Date: 22/03/19
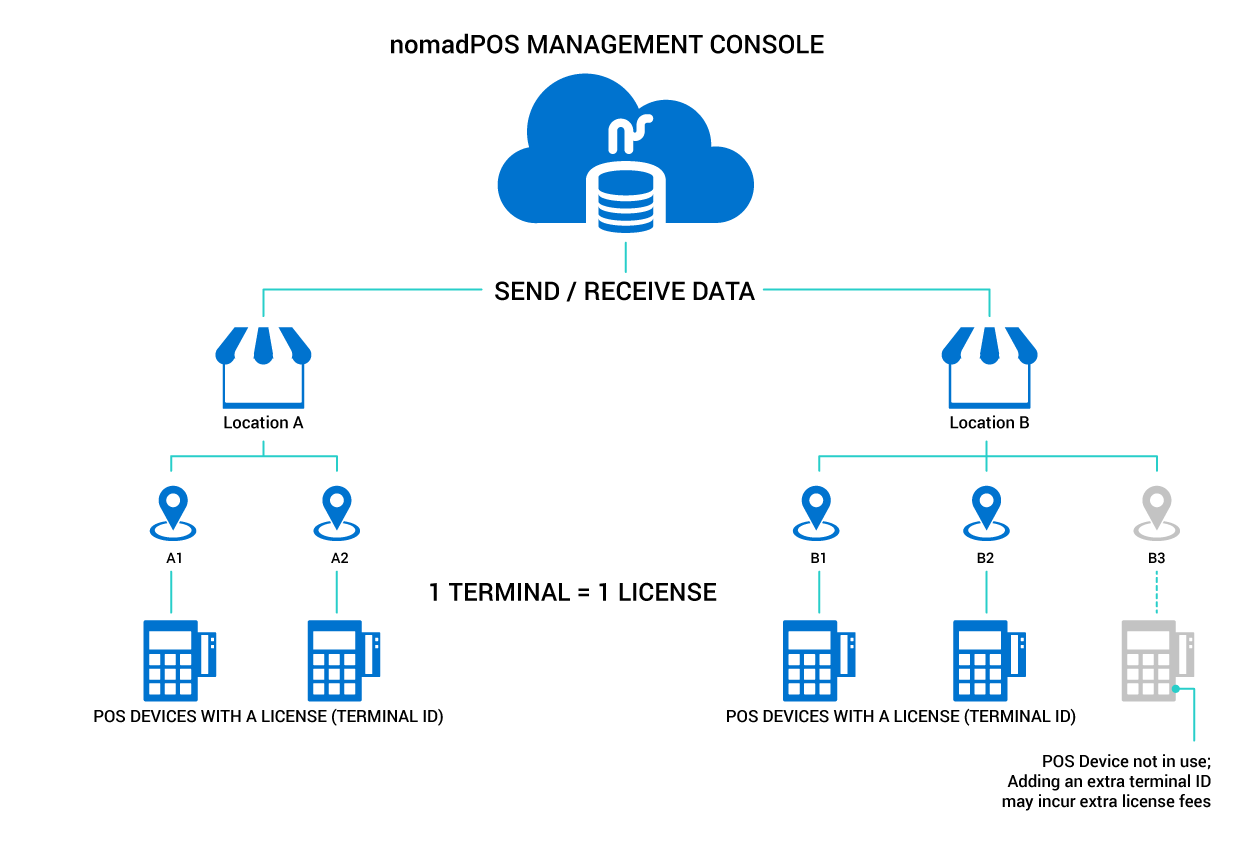
'Terminal IDs’ are Surefires way of counting licenses to charge your business for their usage. So one terminal can only be bound to one device at any time - the device gets all the associated configuration which has been set for that terminal, and the terminal ID shows at the top of the signed in app. You can swap terminal IDs between devices (and retain transaction history), but the previously bound device gets ‘bumped off’. You can create extra terminals in the NMC if you need more devices active, but this may incur additional licence fees.
The Terminals module is where administrators can view, manage, and add terminals which are connected to your console's database.
Things to Consider
- Terminal IDs are unique to each location, so if you have multiple locations, the naming convention of individual terminals might reflect its location e.g. L1 meaning Library, terminal 1.
- One or more terminal IDs are created during initial setup, to allow the physical selling devices to be bound to these terminals. The first time a user points the device to the selected location, they’ll be prompted to bind their device to an available (unbound) terminal. We recommend you create extra terminals surplus to requirements, so that spare terminals are always available.
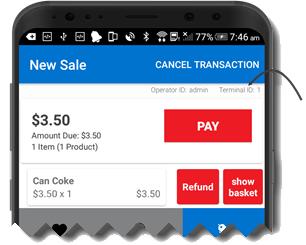
- The terminal number shows at the top of the signed in app.
- From the terminal numbers, a system administrator can identify how many devices are configured, and identify each one by way of a unique name. This allows for the management of terminals independent of the physical hardware. All transactions performed on the nomadPOS app are stored against the device ID of the device. If the hardware is switched out, you can unbind the terminal rom the old hardware and bind it to the new hardware when received, so you don't loose any transaction history.
- You can apply a Terminal Override in Configurations against selected location configurations, for example, if you want a different Custom Menu to display on selected terminal/s.
- You can unbind a device from either the Terminals module or in the Devices module. There's no way to search for unbound terminals in the NMC.
What do you want to do?
Add a New Terminal
View or Edit Terminals
Unbind a Licence to free it up for another Device
Delete a Terminal
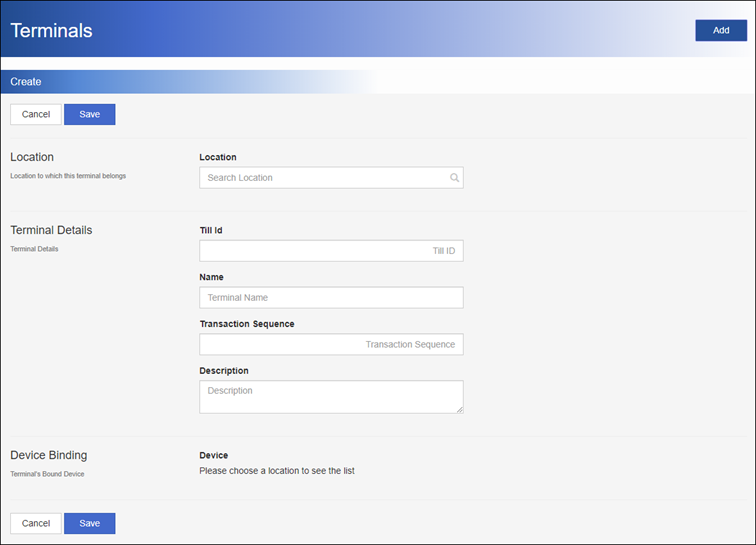
Add a New Terminal
- From the sidebar, click Settings.
- Click Terminals.
- Click Add.
- If prompted, select the Location this terminal will be associated against.
- Type a unique numerical Terminal ID*
Assign the next available till number (1-999) - Type the Terminal Name*.
- Optionally type the Transaction Sequence to begin from.
This is only used if you are migrating an old system, and wish to keep continuity of transaction numbers. - Optionally enter a Description for this terminal, such as the location it belongs to.
- Optionally select a device to manually bind to, if you wish to do this now.
The user will need to sign into the app to see the terminal that was assigned to their device.
If left blank, the first time a user points the device to the selected location, they’ll be prompted to bind a terminal. - Click Save.
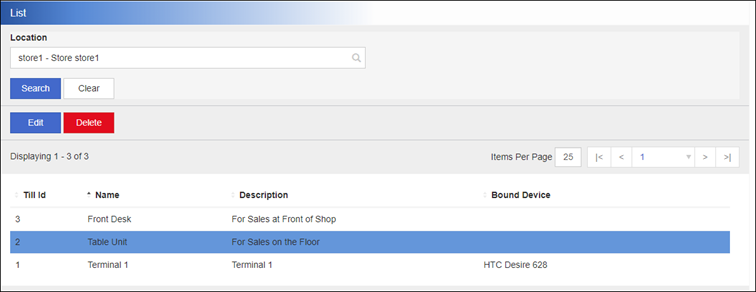
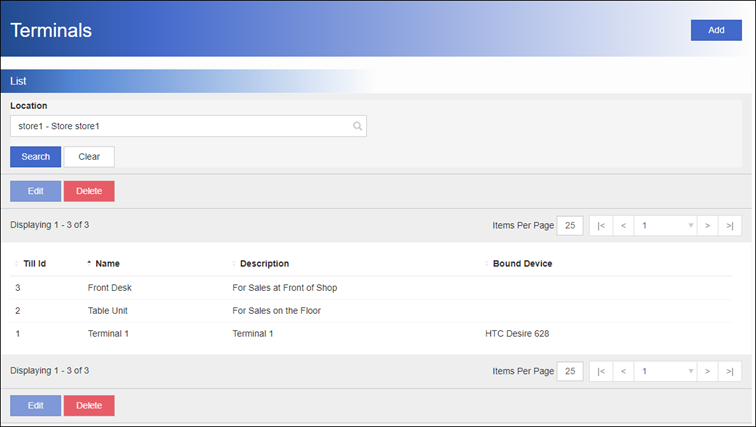
View or Edit Terminals
- From the sidebar, click Settings.
- Click Terminals.
- If prompted, select the Location you wish to maintain.
- Click Search.
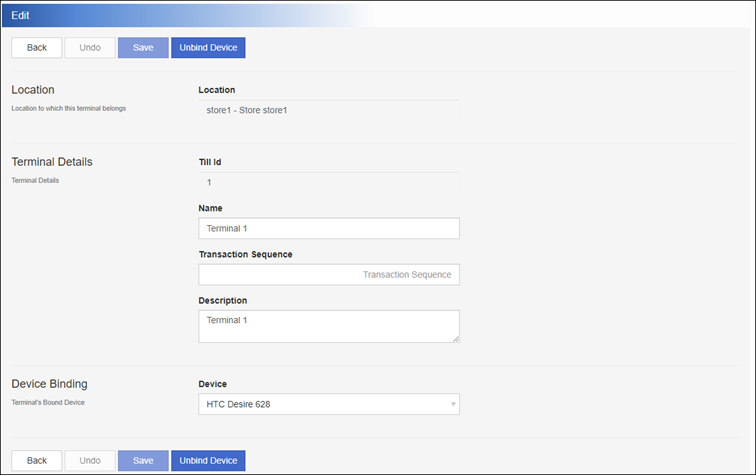
A list of terminals saved against this location displays. - To edit a terminal, double-click the terminal in the list. All fields are editable except for the Till (Terminal) ID. Click Save.
Unbind a Terminal
You unbind a device if the device is lost or decommissioned, and you have a replacement device you wish to pair to this terminal for continuity i.e. transaction number.
- Within Terminals, load the list of terminals for the location.
- Double-click the terminal in the list.
- Click Unbind Device.
Delete a Terminal
You cannot delete a terminal if it’s still bound to a device.
Once deleted, the user will be prompted to register the device again, to a different terminal, when they next sign in. Make sure there’s a spare terminal available.
- First unbind the device.
- Within Terminals, single-click the required terminal in the list.
- Click Delete.
- Click Delete again to confirm the action.